2015-01-13

Imperial Roman: Auxilia II

I've now completed the second unit from my Auxiliary box. In this unit I used most of the metal command miniatures that you received in the box, and I've also made some slight conversions by using a few left over swords from legionaries and added them to the auxilia minis, just to make them a bit different and have a more "close combat" unit that has already thrown most of their spears or have had them rendered useless by the close fighting.

Some pictures is needed I think;


This also brings my first command to completion if you see to the little army list I posted here. Next on my table is a few miniatures I'm going to use as my light auxilia unit. It's going to be a more kind of "hired help" kind of unit.

2015-01-08

Battle Report: Black Powder - Battle of Chancellorsville May 1863

Just before the new year I got an opportunity to play in a ACW game, the battle of Chancellorsville, and the best thing, I didn't have to paint a single miniature, I just showed up and played. It was great!

This game was hosted by Sören (Black Powder Games) and had miniatures from a other few members of our club as well.

Dalauppror has posted some pictures as well over on his blog as has Mark. Please visit them as well if you haven't already.

I was given the CinC of the union army as I have played Black Powder a few times. So the position of Hooker was mine.

First we have here some pictures of the deployment


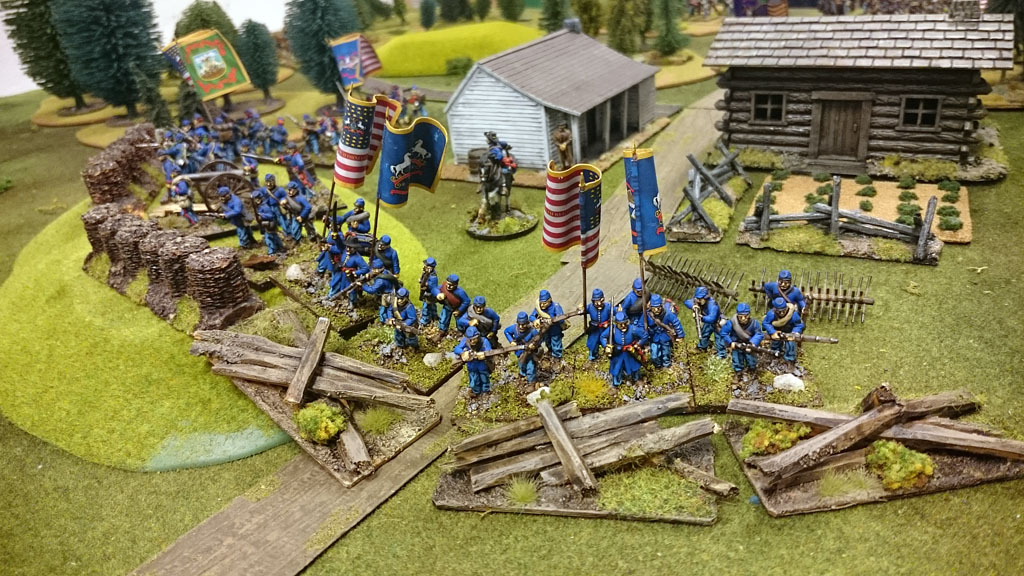
And here is the confederate flanking manoeuvre, my troops are the poor sods taking the first attack, and the ones standing outside of the barricades

Here is a closer look on Dalauprors command

And mine

Stonewall and his merry men under the control of Jesper

Sedgwicks troops just outside Fredricksburg, under the command of Mark

The whole table, all 12'x6' of it

And some more deployment


The first turn saw that the fleeing regiments formed up in haste, and prepared to hold of Stonewall until reinforcements could arrive


General Lee under the control of Sören did his best to pepper our lines and prevent us from supporting the rear and stop Stonewall

Mark moved his troops over the river outside of Fredricksburg to not divide his tr85
+++5oops and drive away the confederates that barred his way.

Redeployment of Hookers troops

Reinforcements arrive at the union camp, but too late to prevent one regiment from breaking and the other from taking a ungodly amount of fire, pinning them in place for the rebs to take at their pleasure.

Sedgwick continues to march his troops over the river

Lee slowly advances his troops, but getting stinged in return

The battle over Chancellorsville is heating up 

In a moment of utter confusion one of my regiments got the idea to walk right out in the field in front of the confederate guns. Not the brightest move of the battle and one that would cost the union army.

Back over at Chancellorsville the fighting is heating up, regiment after regiment is fed into the fighting.


In the middle of the field some cavalrymen is having a skirmish with a reb regiment.

Close combats is happening all around the town

Lee prepares to send in troops for the final push on the union center

At Fredricksburg the union army as formed on the other side of the river and driven most rebs off, breaking the division.

Over at Chancellorsville the hand to hand fighting takes it's toll and ends in breaking my division. But the fighting around the barricades ends in also breaking Lees division, ending the battle with a union victory as the confederate army breaks.

Some end of battle photos


This was a great game, it only took 5 hours to play, even though we had about 500 miniatures on the table and 5 players and in this we snuck in a lunch break as well.
You got to love well written rules =)

That's all for me for this time, and remember to visit my friends blogs to see some more pictures and read their thoughts on what was going on.
2015-01-07

Imperial Romans: Legionaries III


New year, new unit. So this is my third unit of legionaries and what I think is going to be the first one in a new command. To this command I'm thinking of adding another auxiliary unit and then call it done.


My thought is right now to do an army with a composition something like this:
  • Commander 
    • Legionaries x 2
    • Medium auxiliary x 2
  • Commander
    • Legionaries x 2
      • Raw recruits 
    • Auxiliary archers x 2
      • Small unit
  • Commander
    • Legionaries x 2
    • Light auxiliary x 2
  • Commander
    • Medium auxiliary cavalry x 2
    • Numidian cavalry
    • Skrimishers with slings x 2
This if of cause going to change, probably something like fifty times before I'm done, but at least it's a goal for now. This list is made up from the Hail Caesar book, and the EIR list they have in there.

Anyway, pictures of new unit that you are really here to see =)


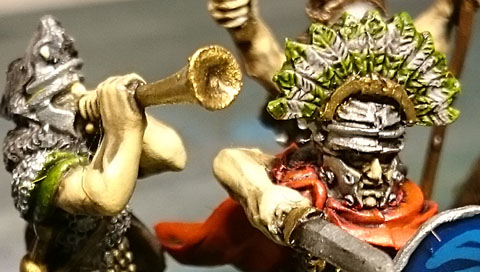
In this unit I've added some parts from the veteran sprue, so some damaged shields and extra armour here and there. I also got a vellum from a Wargames Factory kit I had out in my garage, I think it's from their Celt Warband box. It made an excellent marker for my command in any case.

Next up I'm trying something for a light auxiliary unit and I also have the other part of my medium auxiliary unit in the works. So lots of things in the works, hopefully something of it will be done as well =)


2015-01-02

Lion Rampant: Håtunaleken - Mora Stenar 1301

A little over a month ago we started our Håtuna campaign for real and for our first game, five people turned up, so we divided into two teams, one for the current king – Briger and the one that did not quite agree.
For the King we had the following forces

House of Trolle
Mounted Men-at-Arms
Foot Serjants
Bidowers

The House of Torgils Knutsson  - My force
Foot Men-at-Arms
Foot Serjants
Bidowers

House of Ulvåsa
2 x Foot Yeomen with Mixed Weapons
Bidowers

The contenders brought the following:

House of Bjälbo -Erik Magnusson
Foot Serjants with Mixed Weapons
Crossbowmen

House of Bjälbo - Valdemar Magnusson
Mounted Men-at-Arms
Foot Men-at-Arms

House of Algotssönerna
Foot Men-at-Arms
Foot Serjants with Mixed Weapons

A bit of setup
Here’s Torgils and his brave men in the center


Valdemar and some of the Algotssönerna


Ulvåsa took up the left flank


On the left, Trolle

The first turns saw quite little action as the forces slowly moved towards each other

My forces formed some battle line and moved out

The skirmishing bidowers took some firing positions in a clump of trees...

.., and took good aim on the foot knights rushing up to meet Trolles forces

My bidowers was easely the MWPs of my force, from their position in the woods the shot down knight after knight during the game, here they took down two of Valdemars best.

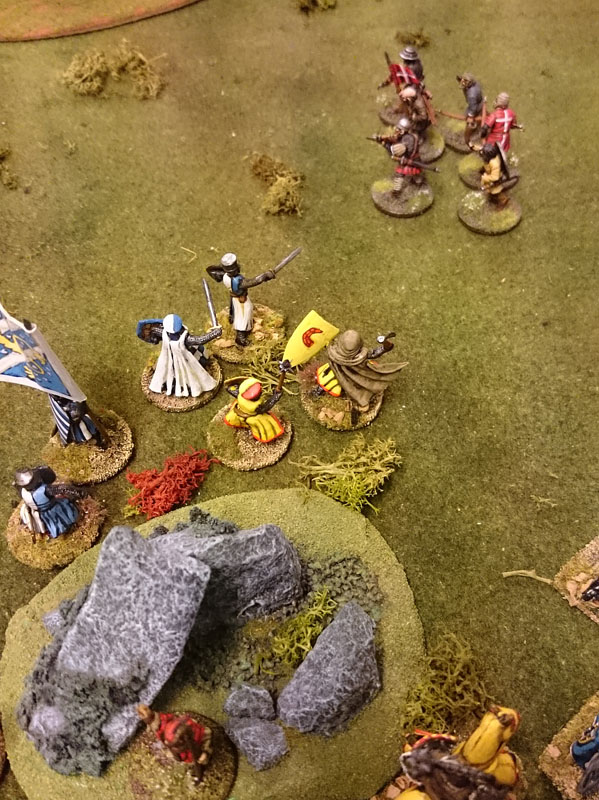
This was something that did not amuse Valdemar though, and he challenged Torgils to a fight one on one, well.. It did not turn out great for old Torgils and the young Valdemar rode him down and he had to be carried of the battlefield by some of his men.


On the other side of the field Trolles knights had finally gotten things sorted out and advanced in line with my forces


Valdemar wasn't slow to throw down another gauntlet, and Trolle steeped up to the challenge, but that was only to be smashed down again, as Valdemar added another helm to his collection.

This resulted in some disorder in his unit, and when the foot knights from Bjällbo charged them, they was all but destroyed, starting a trend of holding back on the side of Trolle, and both Torgils and Ulvåsa started to question if he really was on our side or if he had been paid of...

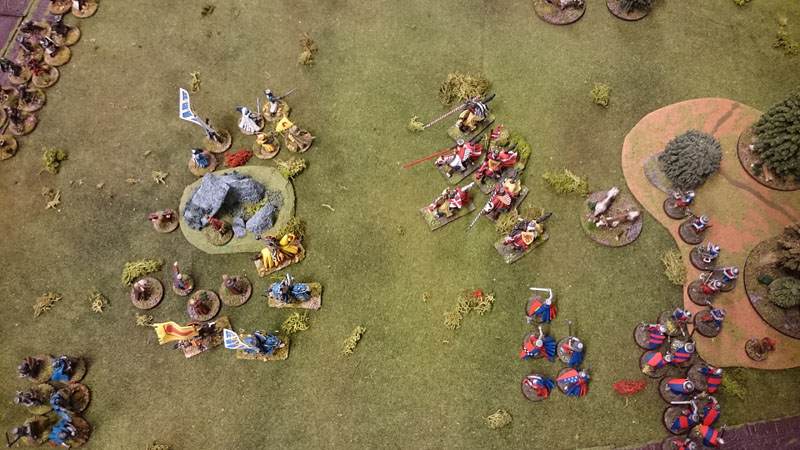
And overview mid battle, my bodowers continued to do great work, and had by this point driven the hated Valdemar to flight after another knight was pierced by crossbow shafts. But the enemy had gathered forces and drawn up a battle line right in front of my and Ulvåsas positions.

My foot sergeants formed a shield wall and awaited the coming charge form the newly reformed Valdemar and Bjällbo that we all knew was coming.

After both had charged and been repelled, the foot sergeants started to be worn down, if it hadn't been for the excellent shooting from the bidowers in the forest they would never had hold them off. But a shield was is a though nut to crack.

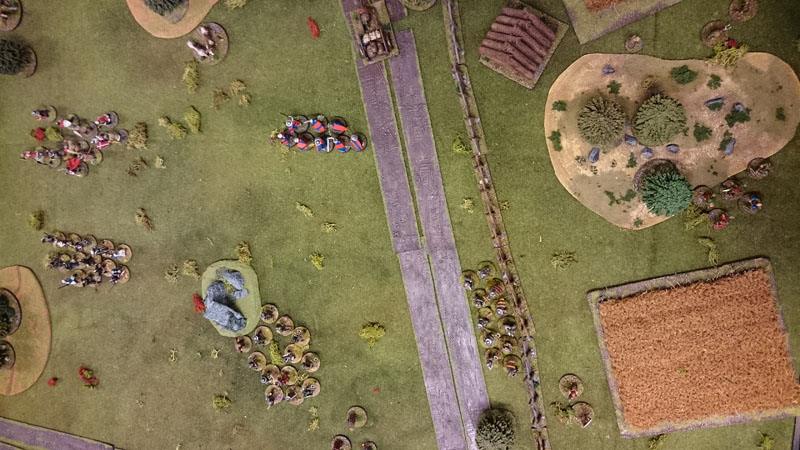
By this time Ulvåsa had moved into a supporting position as well, the fence that stood between them and the rest of the battle had not been great for them, and finally they abandoned it, and joined in the real fight.


Slowed by the terrain, the fence and bad rolling Ulvåsa had so far not contributed to much of anything so far, other than been the target for some arrows and had lost a few brave men here and there.

But another challenge was issued and Ulvåsa and Algostsönerna battled it out, and for once our side had the best of it and came winning out of the engagement. There was much rejoicing on the kings side.


But it was a little to little a bit to late, and soon after the unit disappeared under a cloud of arrows and Ulvåsa was no more and the side of the king had to withdraw and leave Mora stenar to the contenders.


Over all this was an excellent game, I really liked the mechanics in Lion Rampant, and with a card driven activation that we used there was a lot of tension if you would have the jump on your immediate enemy or if they would get the better of you.

You can read another great AAR of this battle over at Dalauppror I can highly recommend you check that out, and since this game was played an I finally got myself to actually write something down, there has been another game played that I sadly could not get to, so check that out too over at Dalauppror.