2012-12-31

Dark Angels - Part XVI - Ravenwing Land Speeder II

As the year is coming to a close I present the latest miniature that has gotten of my painting table, another Land Speeder. This time it's one of the original Ravenwing speeders made way back in -94, I've had two of these since they came out, only ever painted one and forgot about the other in a box. Thats until about two months ago when I found them again.

The one I've painted now is the one that never got any paint in the first place, the other one is still on my desk and I need to clean off all the old globby paint I've put on it.

The main problem with this mini is that it's made of metal, and it heavy... really heavy... So I had quite some problems with paint chipping during the painting process, and not only that, but the fit of the different parts aren't what you would call good, it was quite horrible sometimes, especily the piece that the flying rod comes out of, this holds the main body and the chairs, and I had to be a bit creative to get the parts to stick together. But a few pinns and some grey stuff and it got together as good as I can make it.

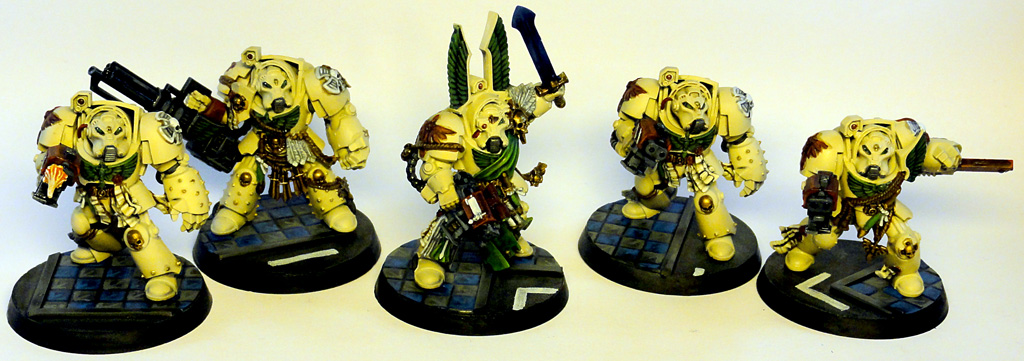
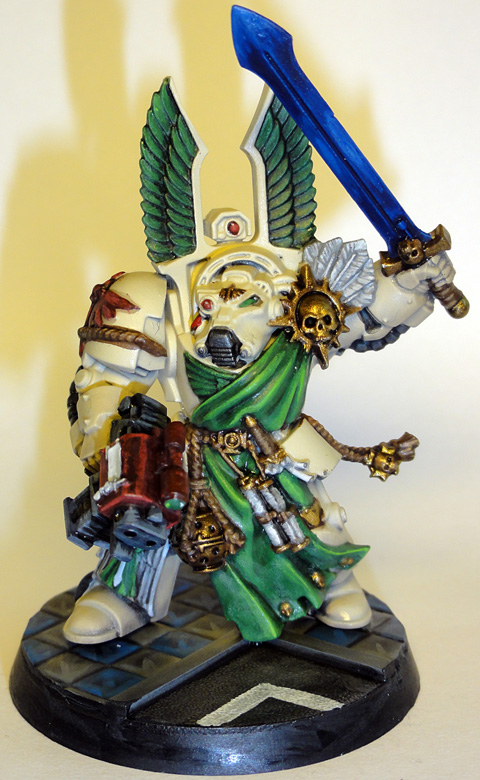
Other than that I added a few new things on it, some extra items just to make it look like they are ready for a extended scout mission. I also added a few small areas of chipping on the body and wings, I'm not overly excited how it turned out, but I have to start somewhere when it comes to experimenting with this.

Other than that, here are some pictures, enjoy and have a great new gaming year!


And the two speeders I have now, there is quite a size difference between the two =)


2012-12-21

Dark Angels - Part XV - Ravenwing Land Speeder I

The last few days I grabbed hold of the Land speeders that comes in the Rawenwing battleforce and started building. I wanted to magnetize it to be both a tornado with a assault cannon and a typhoon with the missiles. So I had to do a bit of work on it, so far I haven't done the best of work with my magnetization, but this time I took it a bit slower, checked and double checked all the magnets before I stuck them in there, and I did succeed far better than before, even if I would have liked it to be a bit better at times.

Then I started with the painting, and here I did one major mistake. I used my airbrush for all the blacks, just to make it much smoother and get it done fast, so stupid as I was I thought; "Well, then I don't need a prime it first"... Not the smartest thing I have ever done. The result was that lots of paint got rubbed of as I worked with it, and so I had to repaint, and repaint, and get varnish on, and then repaint it a bit more. It was horrible and something you should never do, always prime your miniature!

But despite this, the painting did go quite fast, I wanted most of the speeder so stay black so I did not pick out to many details, but more left them as they are. And I think it looks really nice in the end.

So, after painting and putting it all together, I took the photos, and then I realized one more mistake... I forgot to put the ammunition hopper on the bolter... Another facepalm moment.
As it stands now I still haven't gotten the ammo on, right now I think I'll leave it that way, I might paint it up when I do the next one and then stick it on, that is if I remember it then...

Ah, well. I have some pictures on the speeder, based an all;


And all the parts


2012-12-18

Dark Angels - Part XIV - Ravenwing Bikes III

This weekend I sat down and finished two more of my Ravenwing bikes that I started over a month ago. I built them and then tacticals and veterans was more interesting for a while.

Now however they are complete. Sadly I cant really use them right now as they are... The Dark Angels codex only gives permission to field three or six bikes, and nothing in between, so until  the codex hits in another month or so, I'll just have to like it they way it is and play them as vanilla marines if I want to use them all.

I've not really done anything to this set of bikes, my plan is to not have two bikes that looks the same, and even though I already have a plasma gun biker, this time he got a fire effect from Armorcast added to the gun. I really do like these effects, but I have to remind myself not to use to many of them. I'm trying to not use more than one or two in each squad, and have some of them without any at all.

What I have also done this time is getting the bases done, not only for these two new bikes, but for the three I already had as well. So now my whole army has bases and are ready for some action.

I've had some requests of pictures of the whole army as well, and I'm going to take some in the coming week or so, I just have to put a lot of other miniatures away so that I can clear a place large enough to get them all in one shot.

The two new bikes


The whole squad


2012-12-12

Dark Angels - part XIII - Tacticals IV

I've gotten into a bit of a painting streak, and actually gone from start to finish with a few miniatures in under a week. What I've painted now is a five man tactical unit, so now I really have a legal army standing on my shelf.

This time I now only made some Dark Angel symbols to put on their shoulder pads, I also made a tactical symbol and stuck it on there. I really like to have the symbols as this, gives the miniature a bit more character I think. Then only thing I'm not that pleased with, is that they are a bit thick... I don't have any solution for this at the moment, so I'll have to live with it.

Apart from the symbols I made the squad so that they have a com-link and used parts from the Dark Angels veteran set to give each miniature at least something unique. Be it a Dark Angel bolter, backpack or a holster for a bolt pistol. I also gave my sergeant a robe, something I think most, if not all of my sergeants will get. And if it's not a whole robe, then perhaps a tabard as the sergeant from the Dark Vengeance set.

As per usual I have a few pictures of the completed miniatures here for you to see;


2012-12-06

Dark Angels - part XII - Veterans II


After a quite a long time away from here I got some more miniatures completed a few nights ago. I have had parts of my veterans completed for some time, but I what they lacked was some arms, a few backpacks and lots of shoulder pads among other things.

I was planing om waiting to complete them until the new codex showed itself mostly to decide what kind of weapons they should have, but I got tired of having them around and made myself some combi-plasmas for them. I've more or less decided that plasma will be the thing to use by my angels, partly because it's quite good in this edition, and the rumors around them having a lot of plasma everywhere in the new edition.

My combi weapons are made of a standard bolter with the top replaced by the top half of a plasma pistol. Really simple, perhaps not the greatest variant, but one I could build, and can build again without much trouble.

I also wanted to get away from using transfers on my miniatures, while they are nice and can be very useful i thought they lacked something. So I found a suitable plastic part, made a mold of that and did a bunch of greenstuff symbols to stick on the shoulders. I think it worked quite well, and they look nice with this added little thing. The only thing that troubles me is that it's quite hard to get them to stick all over, I have a few feathers that sticks out, and parts thats not quite as bendable as I would like.

I also made a com-link for the unit, this is something I want to have in most units, just to give them a bit more character and it looks right to have it there, they should all be able to call home =)

But here they are, four more veterans to complete my unit of five with the one I painted before.


And a lot of closeups of the individual miniatures


2012-11-17

Dark Angels - Part XI - Deathwing Terminators I

About a week and a half ago I started painting on my Terminators from the Dark Vengeance set, I had also a few days before gotten hold of my first airbrush, so naturally I used this in the process.
I did something kind of zenith highlight, that said I painted them first in my base color for the bone, washed it in brown wash and then started with the base again and painted them from a high angle, not hitting the back and underside of things and then continue with lighter and lighter colors, spraying less and less with each change.
It turned out... ok i guess, I should have been a bit bolder in my base color choice and perhaps a bit more careful with how much I paint with the highlights, but for a first try and the first minis I paint on at all, I'm quite happy.

After the base it came down to all the details, and there is a lot of them on these... It felt like each time I completed something, I found another thing that needed attention. So the painting took far longer than I thought it would.

At least they are complete now, based and everything. So here is a few pictures of them, the lighting wasent with me today and bone was a bit harder to get good photos of than I thought, so you'll have to take them as they are, quite bad...